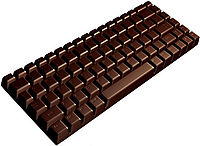
KeyBite
| | |
|---|---|
| A slap of chocolate looking like a keyboard | |
| |
| Meetings: | none |
| Type: | art
|
| Status: | concluded |
| Members: | |
| Contact Person: | Gunstick (mail) |
| Tools | |
| QrCode: | 
|
The idea came up when coworker wanted to donate a chocolate keyboard to a fellow sysadmin for his recent not so skillful achivement.
So the idea is to create a classic slab of chocolate (200g) but with the different pieces arranged like a keyboard with the key labels QWERTY...
Contents |
[edit] The Keyboard
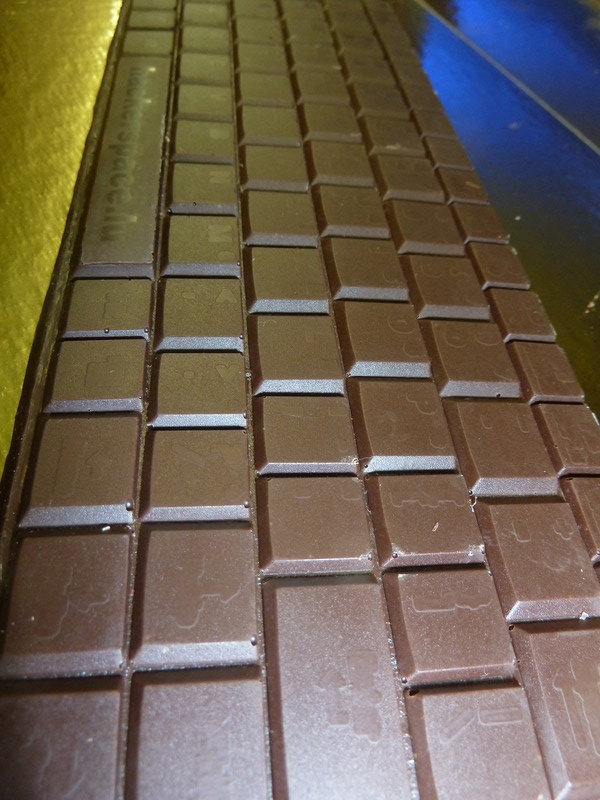
The keyboard should be rectangular and the average size of a chocolate bar. You could build a mould from scratch but that is only realistic if you have a high precision CNC or 3D printer. Chocolate will reproduce every tiny imperfection! A real keyboard is too huge, so my choice was a keyboard from one of the first Eee PC netbooks. I ordered it from eBay for around 20€ What is interesting about this keyboard is that the labels on the keys have the form of the letters. This will be reproduced in the final product.
[edit] The Silicone
There are several methods to create a mould from an object. Silicone is the most precise. It has to be alimentary silicone. One liter costs 43€ (incl shipping) and can be bought at [GS Industries ebay] or [website]
It is a 2 component silicone with a very fast solidification time and very good fluidity.
There is a good technique to mix the silicone without bubbles. But you have to be fast. http://www.youtube.com/watch?v=WtodXHMDOP8
[edit] Creating The Matrix
To create a mould you need to have an initial object where to pour the silicone in. Simple objects are easy. Build a small wall of cardboard around your object, pour silicone in, done. This object for pouring silicone in, is called a matrix.
The keyboard is quite complex, it has moving parts.
The first try was a disaster. Despite removing the springs and, the silicone went under the keys and into the mechanics. Result was an unusable form with the keys marked in it. To undo this, the keyboard suffered quite a bit.
Next try was to build the matrix from scratch. The bad mould done before served as holding device for the keys which I put in the correct order into the holes. Then put 2-sided glue on this all. So I got a "sticker" with keys. This was pasted on cardboard to give some height.
The next mould was OK, still some silicone went under the keys.
[edit] Moulding
Just do like on the video, but due to the 4 minutes curing time, prepare all moves to do beforehand and exercise a little. Put up the matrix and pouring table, have all cups and stirring tools ready and don't let yourself disturb by nothing. You need 4 minutes of pure concentration.
How much silicone to create? This is a tricky one. One idea is to pour rice into your matrix, then see how much that is and create the same amount of silicone. This method works but it puts a lot of dust into your nice matrix. Maybe tiny plastic balls would be better.
Have one plastic cup for mixing, another one for pouring. The second cup has a hole at the bottom. Close it with sticky tape. Mix 1:1 the silicone in the first cup. Use a scale to easily make an equal mix. When well stirred, pour the stuff into second cup and mix again.
Then place the cup on the edge of the table and remove the tape. Put the matrix so that the stream of silicone falls into a corner.
Wait so the silicone cures. Then cautiously remove the mould from the matrix. Sometimes one or the other key pops off and sticks to the silicone. If you need to make another mould, you'll have to clean the matrix from all silicone and glue back the popped keys.
The mould always needs several hours of removing borders. The silicon can't be cut by anything classic, a sharp scalpel works.
To make the finished mould clean for first use, I use this (self invented) trick: just put water in it and freeze. The frozen water will encapsulate almost all dirt. Remove the ice and you get a clean mould. Don't use that ice as frozen key-ice for your drinks as it contains dust and silicone!
[edit] Chocolate Handling
Once the mould is ready, the chocolate can be prepared. The exact temperatures vary depending on the type of chocolate (white, milk, or dark), but the process is identical.
The goal is to produce a tempered chocolate, which has all the features that make chocolate so beautiful and delicious. Chocolate can crystallize in 6 different ways, but only one brings out its best qualities. If the chocolate is properly tempered, it's colour is nicely and uniformly dark, the surface glistens, and the chocolate will snap in a very satisfying manner
As the process is very temperature dependent, a thermometer is absolutely essential. Digital thermometers are nice, and can double as a stirring stick.
For dark chocolate, first the chocolate must be heated to above 45°C. Above this temperature no crystals are left in the chocolate and thus it's ready for proper seeding. However, great care must be taken not to heat the chocolate above 50°C, as this burns the cocoa butter and destroys the chocolate.
Second, the chocolate must be allowed to cool to just below 34°C. Once below 34°C, a seed crystal is added by taking existing tempered chocolate and adding it to the cooling chocolate. Once the chocolate is seeded, it needs to be heated up again to 33°C, but no warmer. If the chocolate reaches 34°C, it needs to be reseeded.
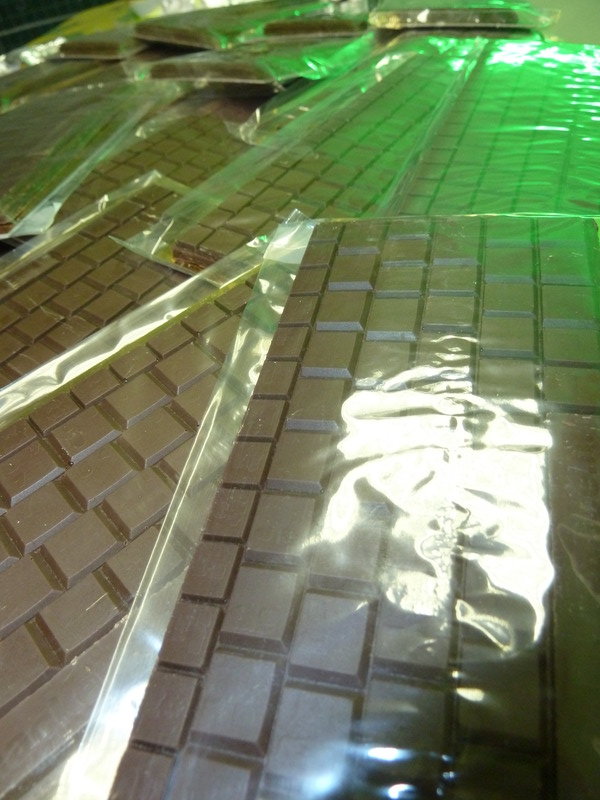
At this point, the chocolate is ready to be poured into the mould. As in the case of the silicone, bubbles that are trapped in the chocolate need to be eliminated. And, again, as in the case of the silicone, the bubbles can be removed by pouring from a high place. And, again, the bubbles are further removed by agitating the mould.
Once the chocolate has been poured, it takes up to 3 hours to fully cool. In order to verify that the chocolate is indeed properly tempered, a small glob of chocolate can be placed on a surface where it will rapidly cool. If the chocolate was not properly tempered, or any other defect has occurred, the chocolate can be remelted any number of times.
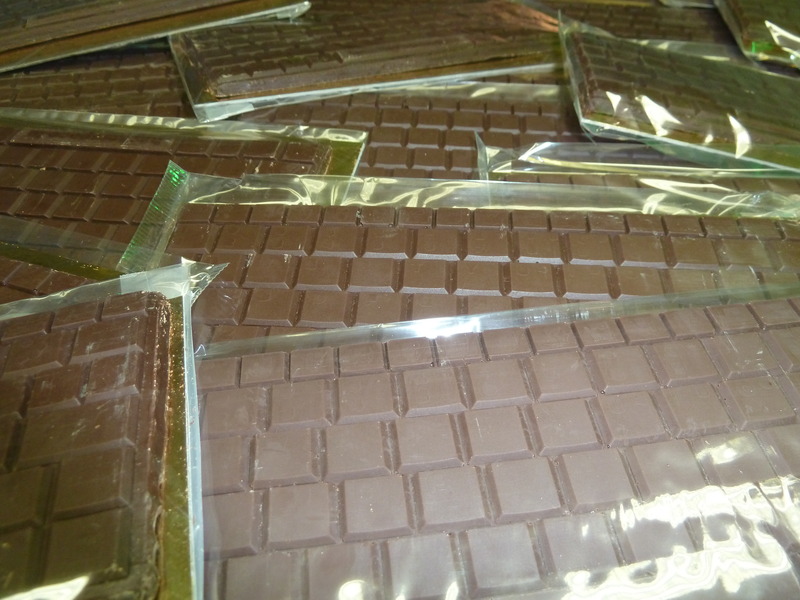
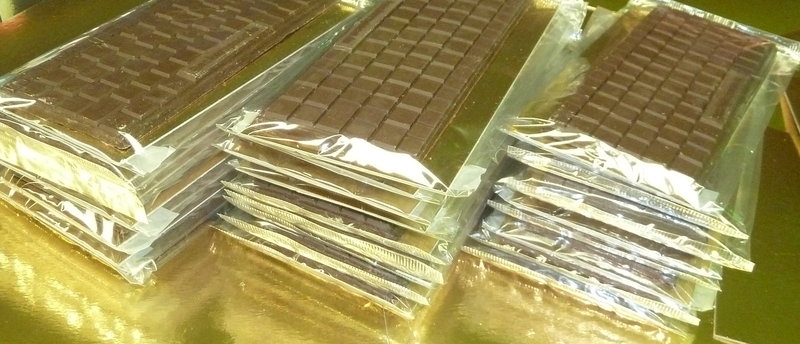
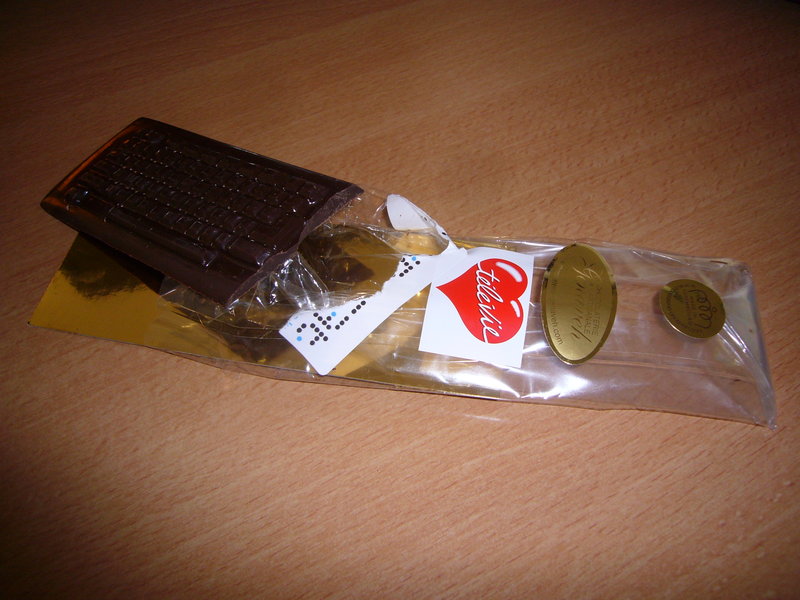
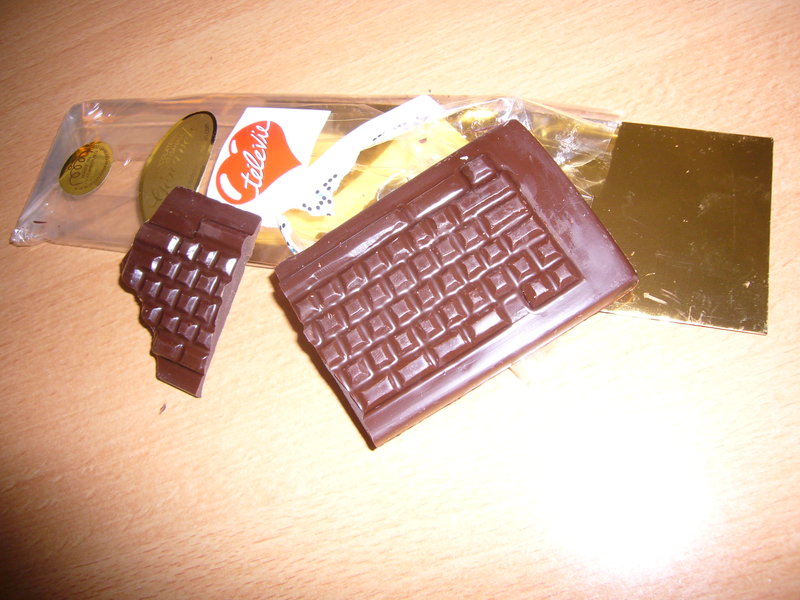
[edit] Packaging
Of course a treat like this needs a convenient packaging. But finding a suitable box was really impossible, so I settled with cellophane bags and cardboard (fond de bûche) obtained from [Muller & Wegener].
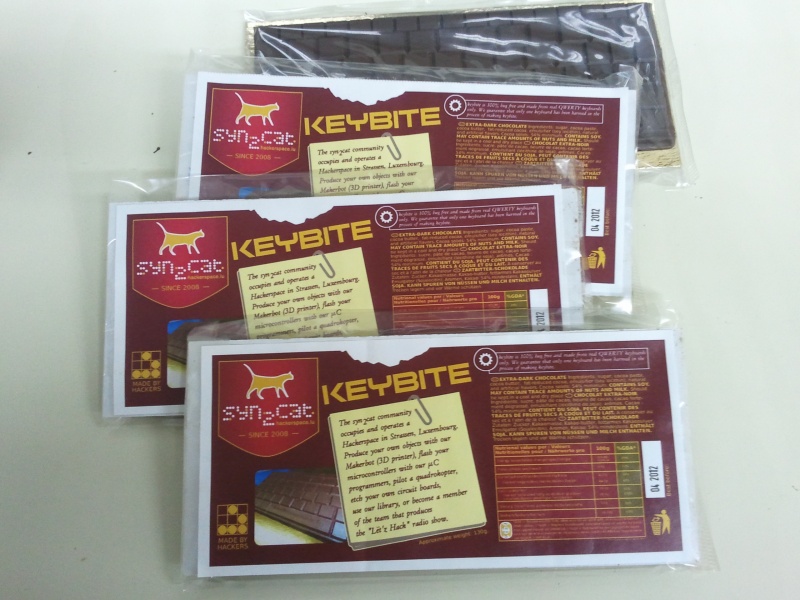
The most important is a nice sticker at the back. 3 of those stickers were printed on A4 paper and then cut. There are featured some explanations about syn2cat and the nutrition facts copied from the original chocolate used.
A little brainstorming produced the geeky name of "keybite" for this nice hacker product.
[edit] Photo Gallery
First Chocolate keyboard made with a bought form. Note that it's about 1/4 of the size aimed for. So molding a real keyboard is the next step.
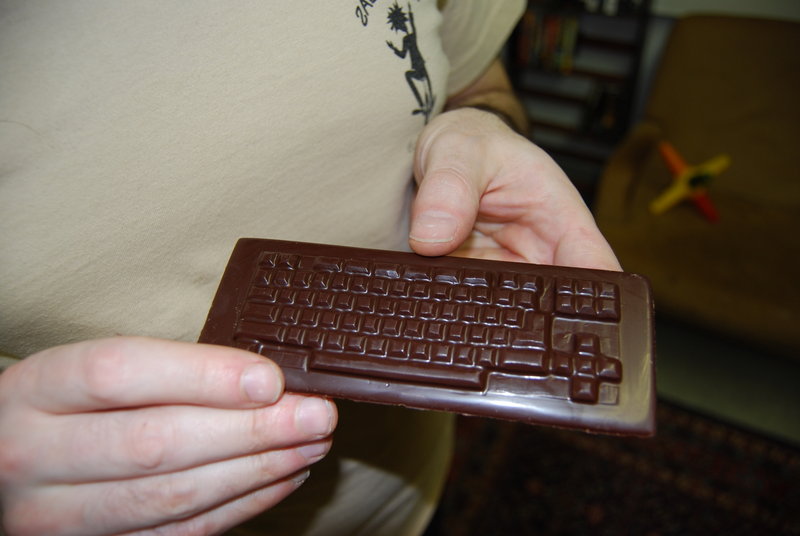
First bite of the first sold keyboard. Yummy!
Who wants a piece of keys?
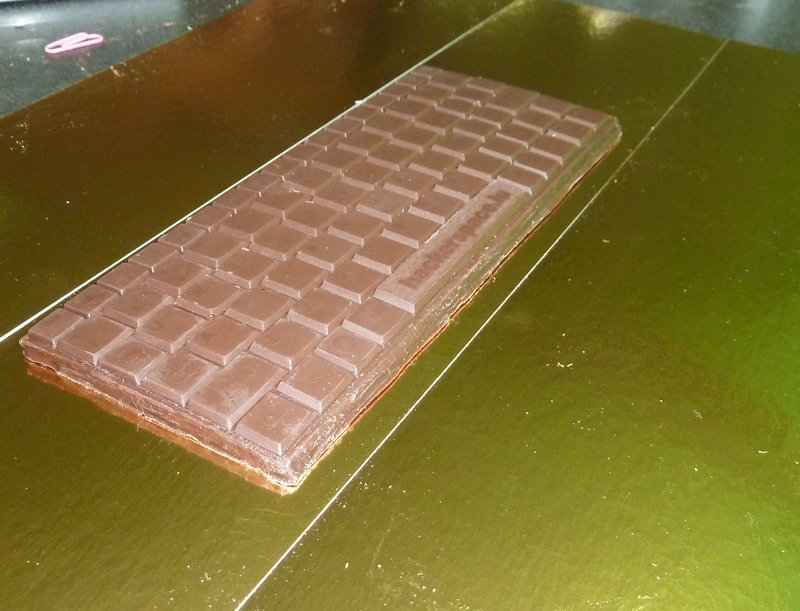
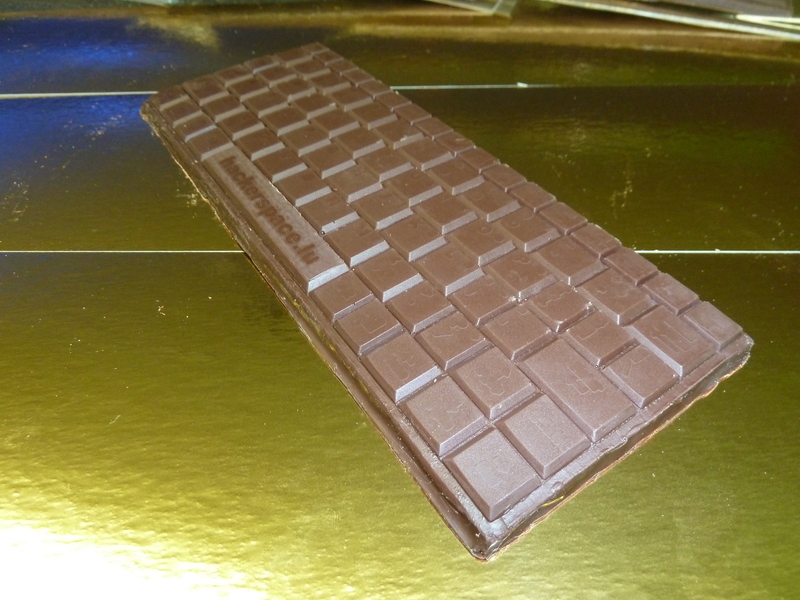
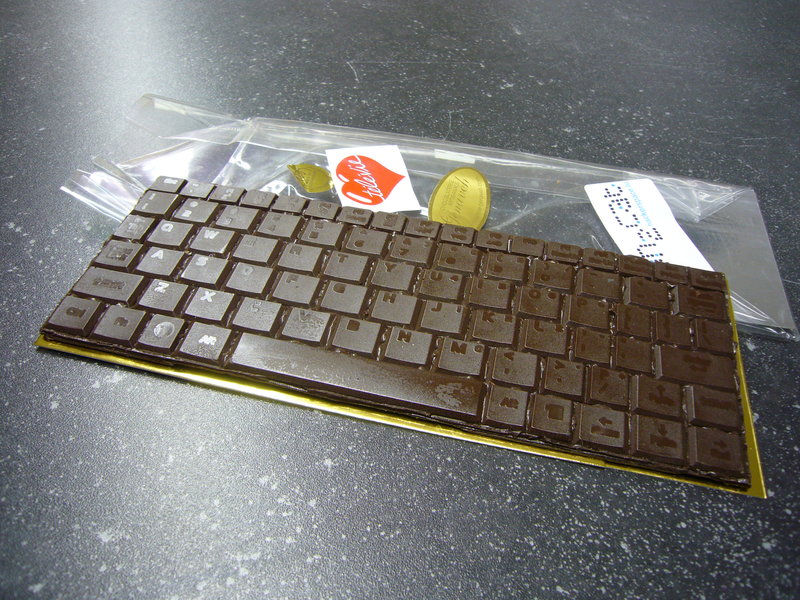
[edit] The big keyboard
After lots of trial and error, the first keyboard arises from the silicone mold. Thanks eeePC!
[edit] Christmas Keyboards
This time all is self made.
The form matrix is done by Gunstick, and the original keyboard model is by ASUS, and the silicone is by GS Industries, and the molds are done by Gunstick, and the Chocolate is by Cote d'Or, and the tempering is done by Gunstick, and the packaging is from Mueller et Wegener, and the wrapping is done by Gunstick and the label is done by Kwisatz, and the poster is done by Macfreak109
And the name is KEYBITE